The Stormfoot Catacombs is a blockout project in UE5. The methods and tools I used were UE5 new geometry tools, procedural generated stairs, brainstorming, moodboard, low fidelity sketches, mid and high fidelity game engine concepts.
Brief
I tried to recreate Stormfoot Catacombs from Elden Ring. I created 3 simple obstacles and a puzzle to complete, the same as the original level. The total time it took was 7 days.
Research
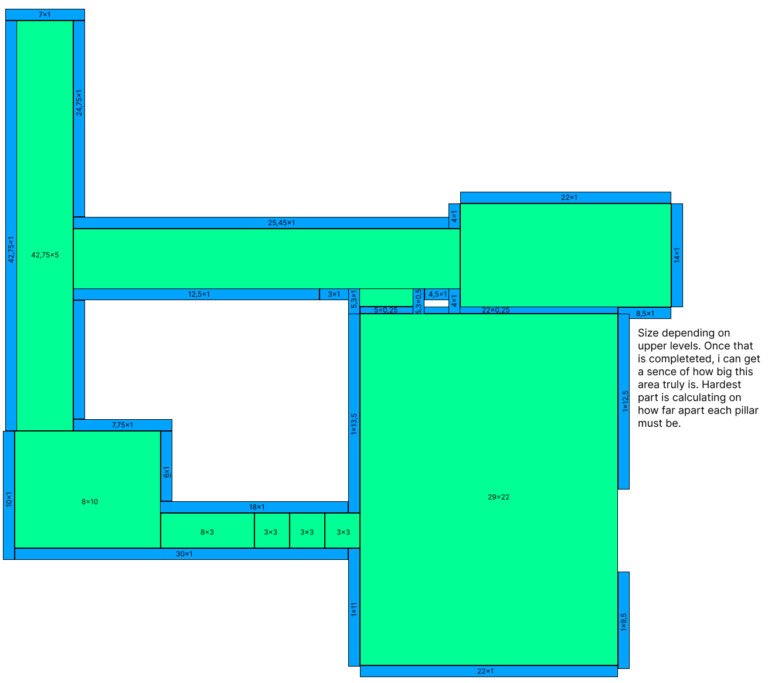
The difficulty of recreating a level is to understand how big the level is, for my case this level had no documentation on it so I relied solely on my understanding of gameplay, video references, and image references to determine the size of the map. I created a very early prototype and sketches to play around with dimensions until I was satisfied.
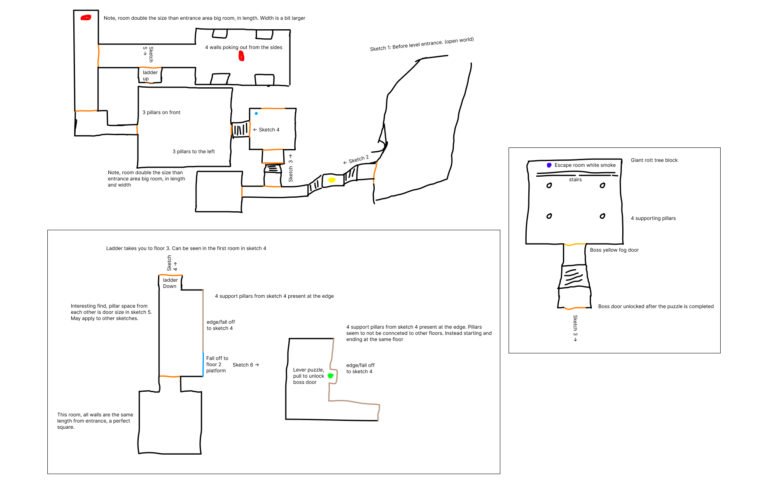
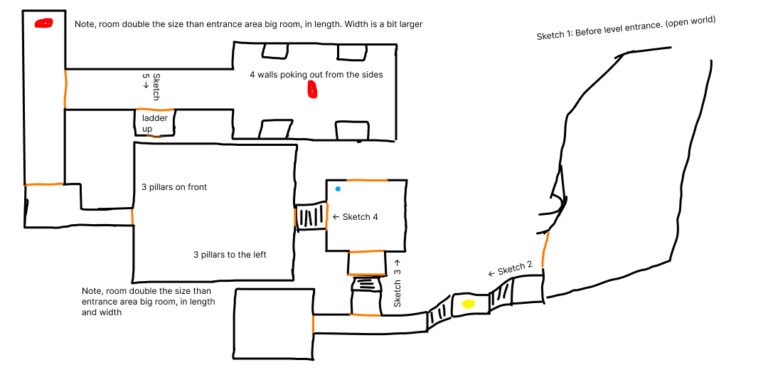
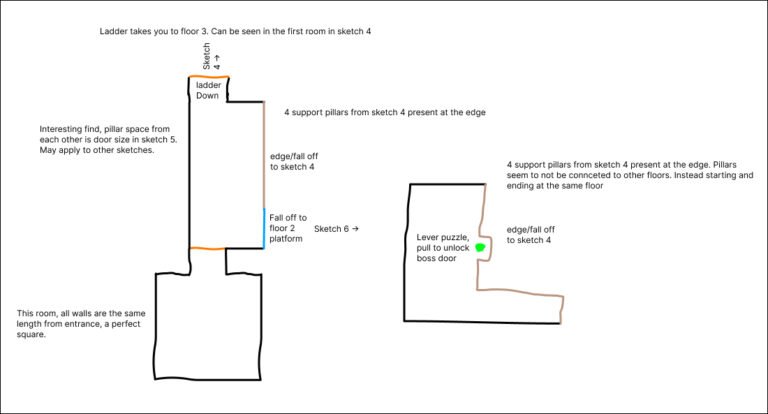
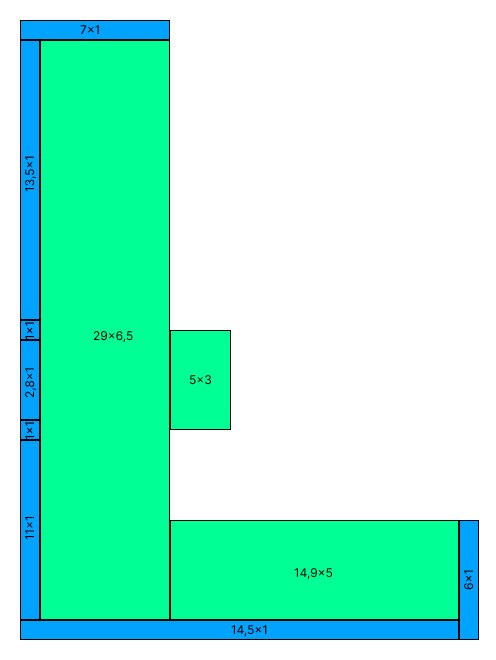
By playing the level and recording the level for later research I made a very simple sketch showing the entire level. This only includes how the level looks with no dimensions or sizes.The first floor is all connected with stairs, red colors indicate obstacles and blue dots are interactable, green is the puzzle. The yellow is the “Grace” (save point). Orange lines are entrances to different pathsSketches for second and 3rd floor. These floors are accessible from a ladder in sketch 4. On the 3rd floor is a fall off to floor 2, there is a puzzle, a lever to pull. Once pulled a door will open.Boss room sketch. The Boss entrance door only opens by pulling a lever. The lever is found in Sketch 6/floor 2 and the door to the boss is located in sketch 3. This level will not be included in later iterations but the door puzzle will still be present.Figuring out the width between pillars, length of stairs, height of walls and walkable surfaces. Since there is no manual to how the level was created I had to rely on my eyes and my early tests in the engine to gather data on level size.Testing in UE5 with a simple greybox and pillars to capture the size of the reference imageRecreating the angle of the stairs and the length of the stairs to the second platform.Putting everything together to understand the dimensions, angles, and geometry of the level before starting sketching a top down view of the entire level. The reasoning is to fully understand what sizes I’m going to be using in the engine then use these exact sizes and implement them into sketches once the entranceway to the level was complete. Now it was time to sketch out the entire level in Figma.
Previous
Next
Sketches
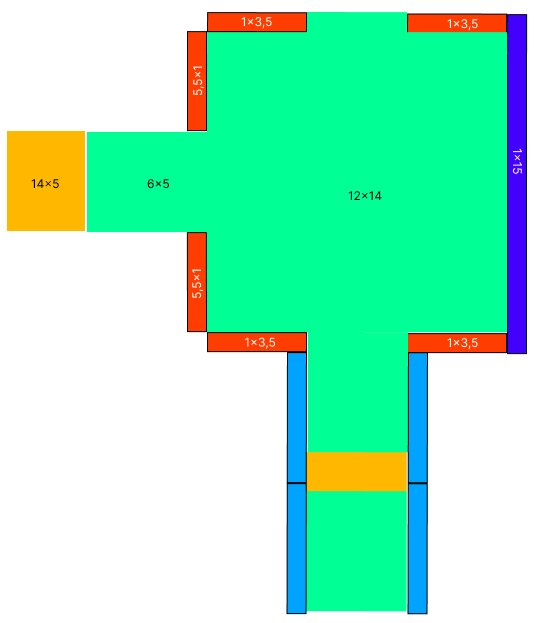
After researching and testing dimensions in the engine, I was ready to start creating a top down view of the level. Made a total of 6 sketches to be created and connected. Although I did manage to get the sizes right I still needed to readjust some numbers as some walls were too big and other walls were too short in later iterations.
Sketch 2Sketch 3Sketch 4Sketch 5, 3rd floor seen from first entrance of Sketch 4Sketch 6, 2nd floor seen from first entrance of Sketch 4
Previous
Next
Grey boxing
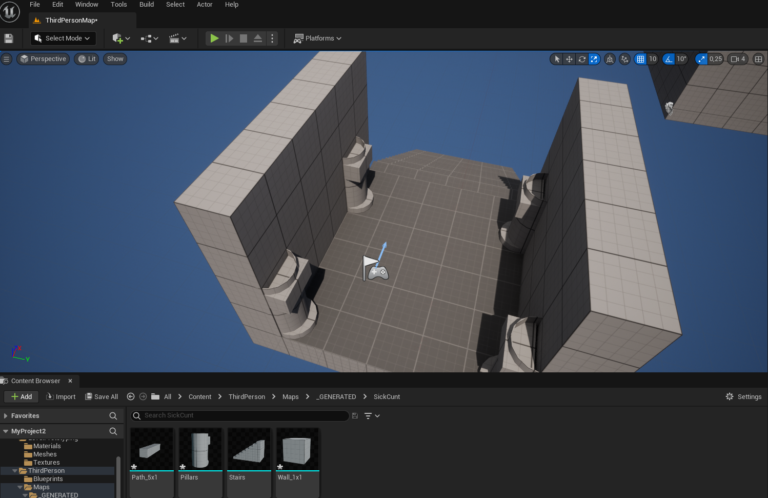
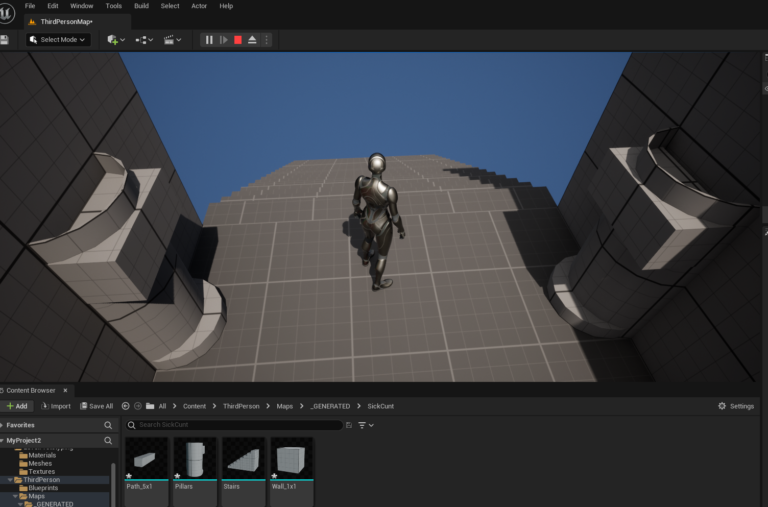
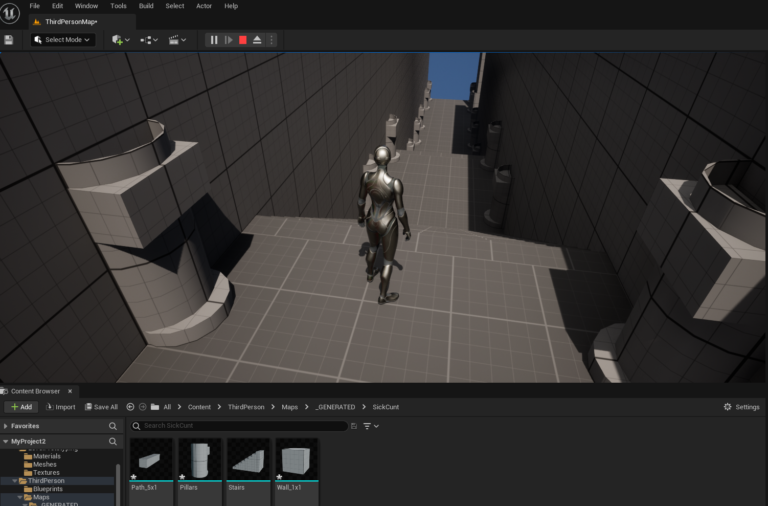
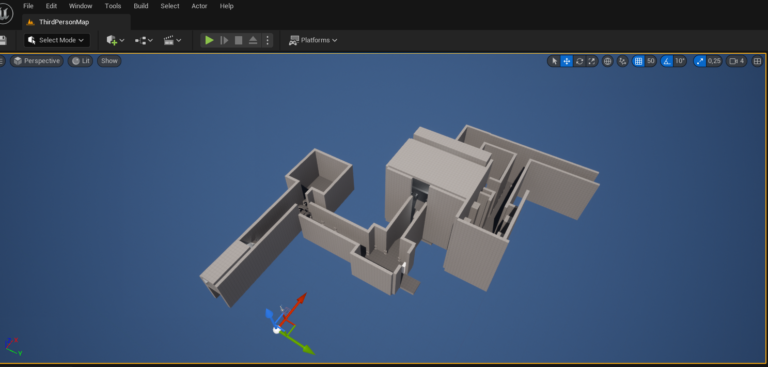
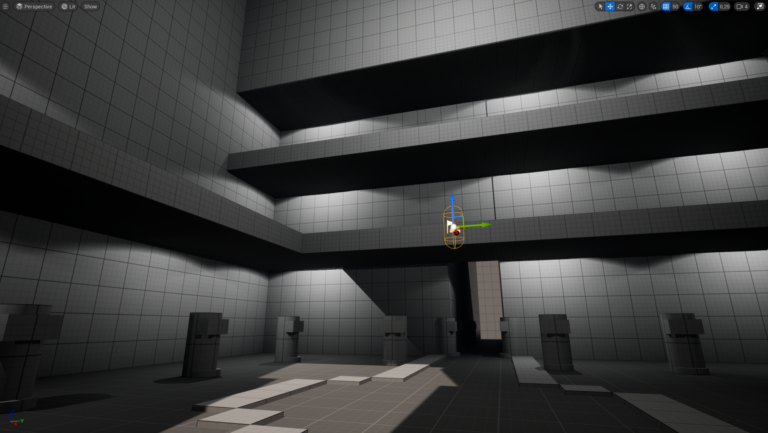
Grey boxing the level based on previous sketches. I had to work a lot with vertical and horizontal lines to achieve what the level designers originally did in Elden Ring. Some areas let the player view large areas of the level from far away. Some areas limit the view distance and you have to get closer to be able to understand what and where this path takes you. By using the geometry tools in UE5 i created a low fidelity level blockout. In doing so I understood that some of my sketches were not perfect and needed to change to match overall size. I also implemented simple obstacles and a lever puzzle similar to the original level of the Stormfoot Catacombs
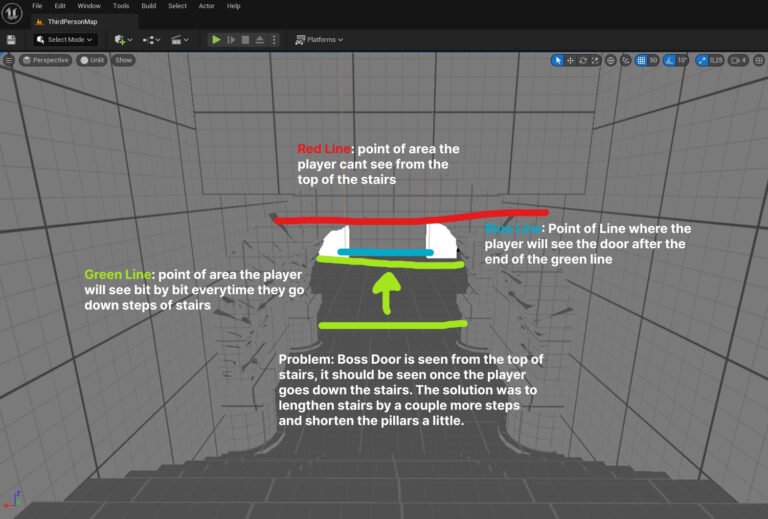
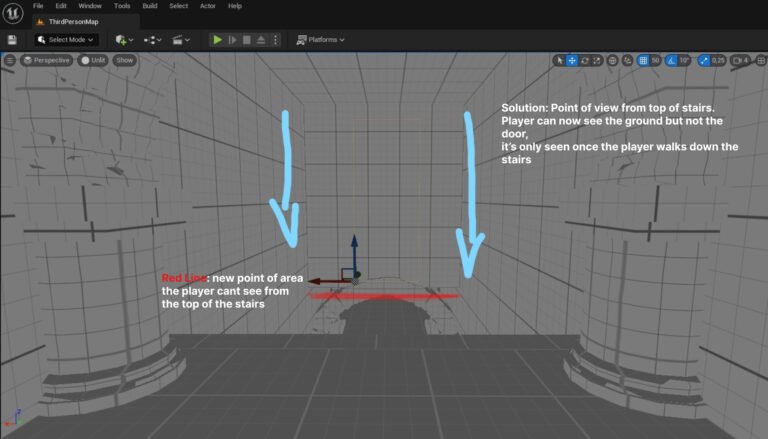
Early overview of level. Designed based on sketches created previously.Sketch 4, 5 and 6. Floor 2 and 3 seen from floor 1 in sketch 4.Solving depth problems of upper floors. 2nd floor is smaller than the 3rd floor. 3rd floor is much wider in comparison but both floors are in line with each other and seem like they are the same size when looking up to them from floor 1/sketch 4.Stairs problem, looking down into paths from above. In Elden Ring when you stand on certain stairs you are unable to see what path is ahead at the bottom of the last stair. I had to somehow make it so that when the player goes down the stairs, each step down will let them see more of the path at the bottom.The stairs problem was solved by lengthening the stairs by a couple more steps and shortening the pillars a tiny bit.
Previous
Next
Modeling meshes
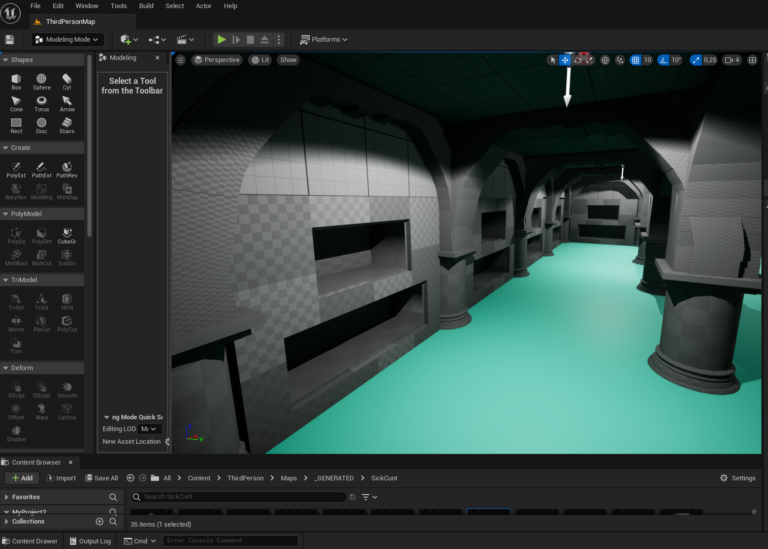
To make the level more alive and accurate to the original level I had to implement meshes to the level. By using the geometry tools in UE5 I was able to create multiple meshes on the fly without worrying about using blender or Maya. Furthermore, since I had a lot of assets in the scene it was very performance heavy in the editor. To combat this I used Nanite on certain large meshes to reduce framerate drops.
Adding decorative funeral stone casketsCreating pillars of 3 sizes, one for corridors, entrance pillars, and room wall pillars
Previous
Next
procedural stair actor I made for a tutorial. Reusing it on my level.
Creating custom meshes using geometry tools in UE5.
Final results
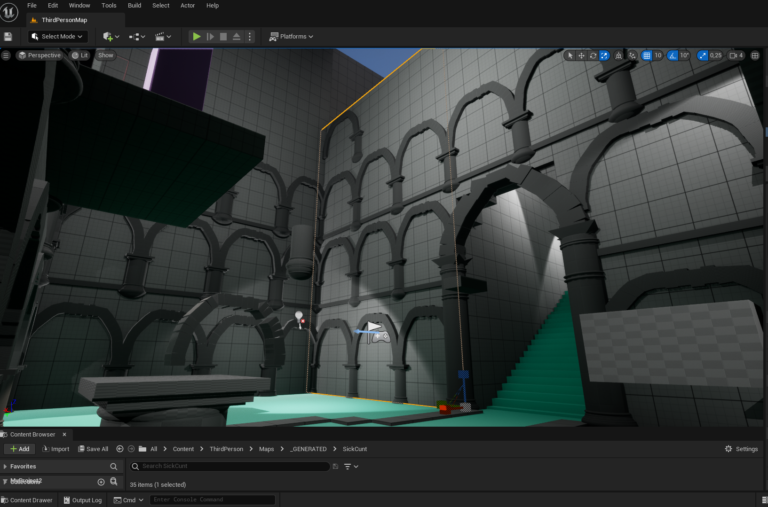
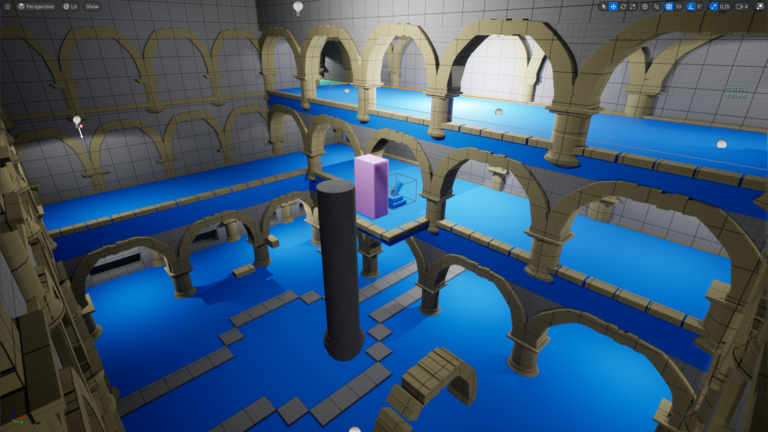
I added decorations and color-coded the level for showcasing the walking area, obstacles, walls, etc. The last thing I did in this project was to determine the height of the roof, each room being different I used different methods. Some rooms use giant wall pillars to determine roof height, others use normal pillars and stone wall caskets.
Adding wall decoration pillars, not because of the original level also using them but to calculate how tall the roof should be. By doing this I had an understanding of using 3 pillars before hitting the roof in this room, being the largest on the levelAfter adding new pillar meshes and decorations I color coded the level, with blue being a surface to walk on. Grey being walls, gold being obstacles